This site contains affiliate links to products. I may receive a commission for purchases made through these links. Know that these opinions are all my own, and I would never recommend something I wouldn’t use myself!
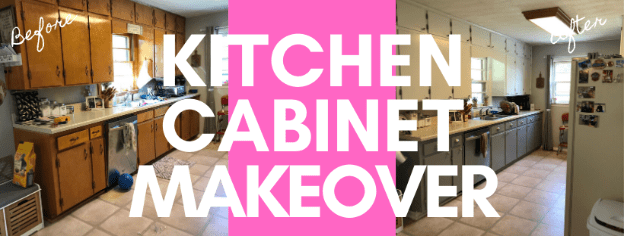
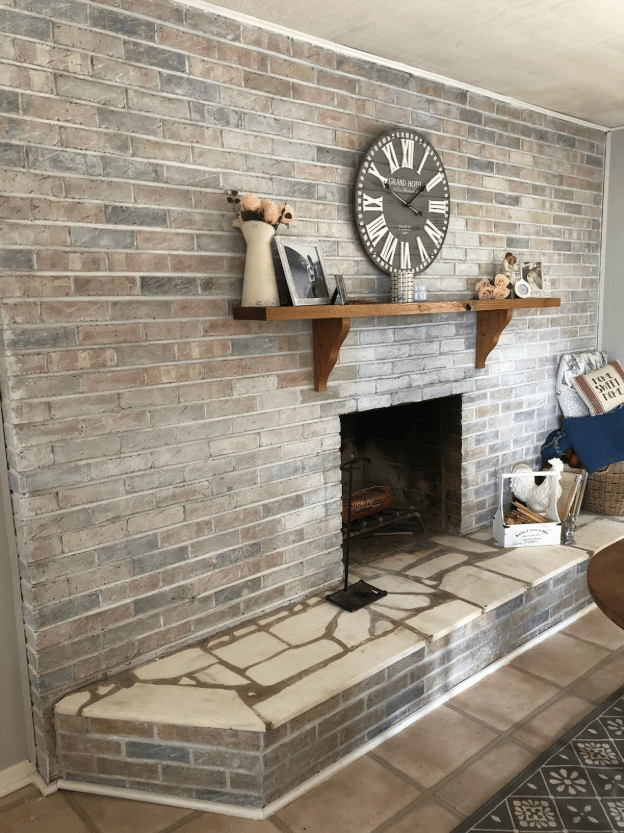
This is by far the biggest project I have done to date. I was so happy with my fireplace makeover that I was on a bit of a confidence high. I was basically Wonder Woman’s side kick, because I JUST PAINTED MY FIREPLACE, and it looked boss. So after tooting my own horn and doing some research, I began the process of repainting my kitchen cabinets.
I was putting this project off because we: A) had no money and B) had a little, curious, active boy running around our house. Once he was older and we had some extra money (thank you, VIPKID), the time seemed right. One thing that all you daring women should note on this project: I did this primarily by myself. I did! I say that because if I can do it, you definitely can, too. I’m not really a handyman, and I have zero upper body strength. Don’t tell yourself that you’re not skilled enough, because that kind of talk will keep you from getting a house you love. Pray that God will help you, research, and work hard.
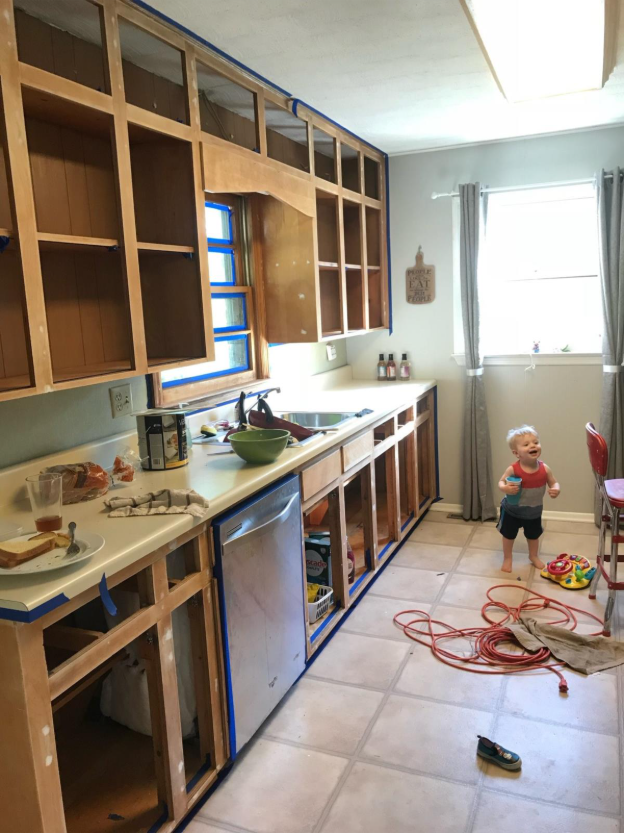
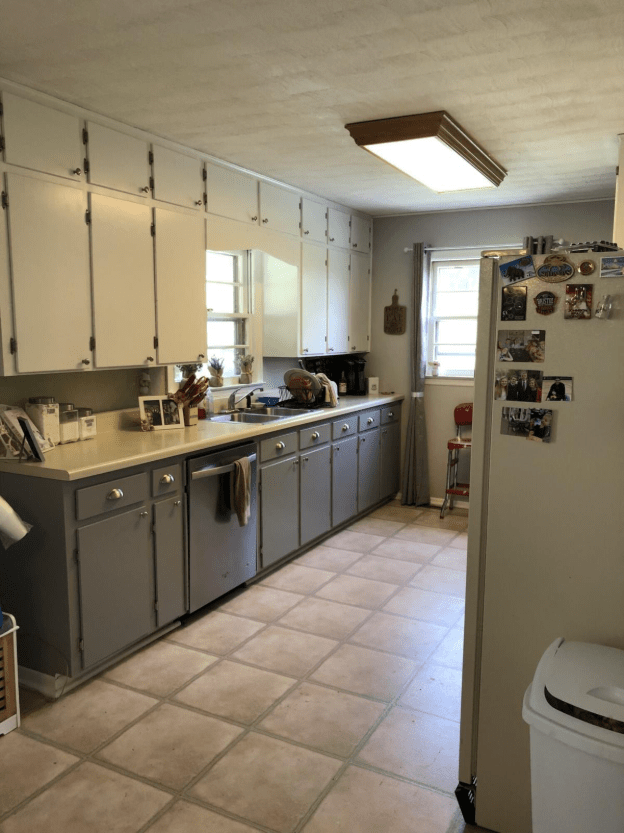
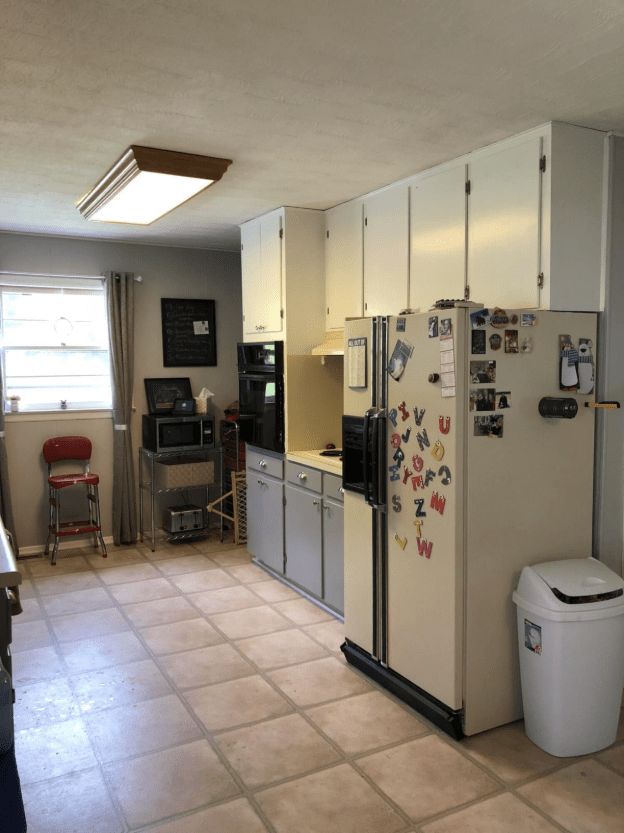
Now, for your viewing pleasure, I have posted the original kitchen below. This is what it looked like after we painted the whole house a cool gray (please excuse my clutter. You know how in home shows, you always think, “Well Betty, if you just ever cleaned up your house, it would already look ten times better?!” Yeah, that’s where I was at in this picture).
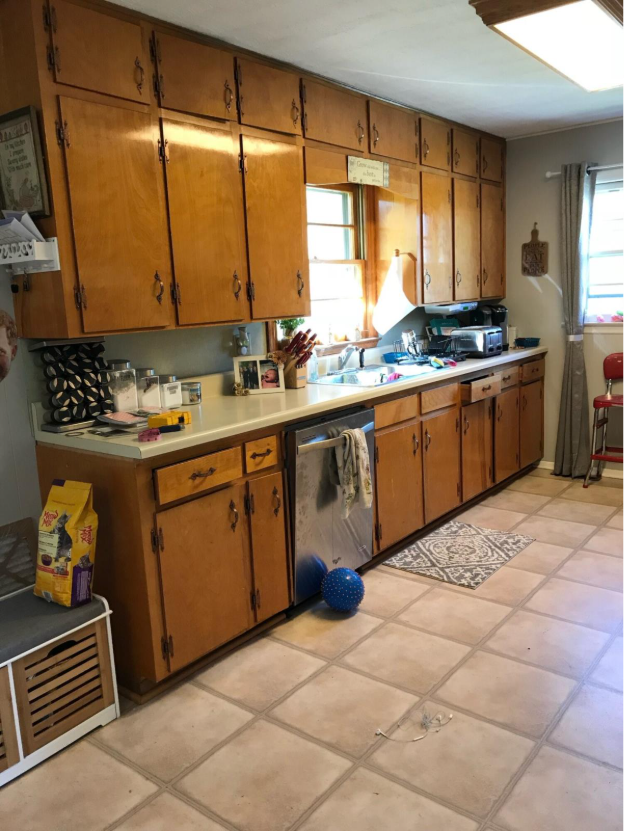
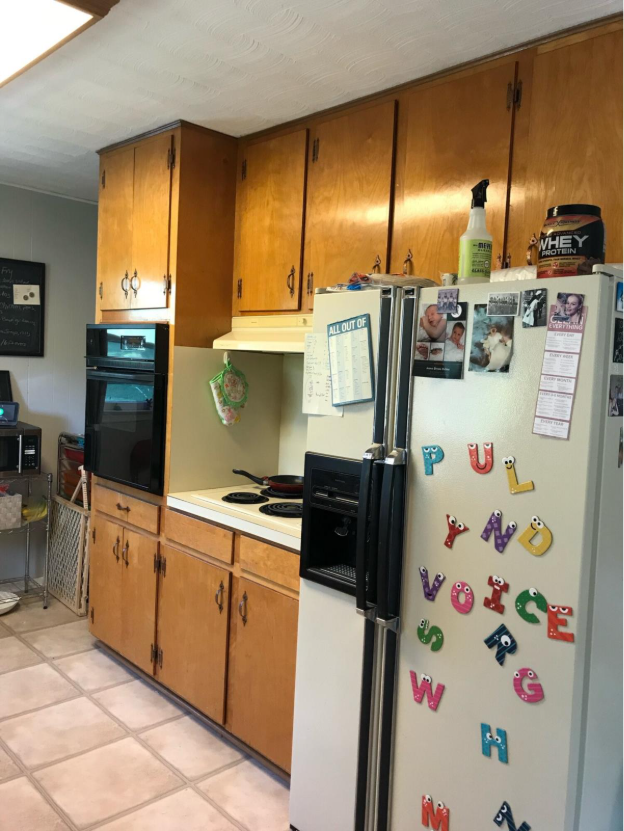
As you can see, this was no small project. There were over thirty doors plus the drawers.
Before I began, I nailed down my “Why?” If you don’t have a strong “why,” then you’ll give up when it get’s rough. I asked myself why even bother painting cabinets when there is already so much other stuff to do? These were my reasons: First of all, I wanted to have the peace and calm that came with a unified living space. These cabinets were an eyesore, they didn’t match my gray paint, and I wanted to change them. They were sucking light out of our house, and it always made me feel like our house was a little dirty. On top of that, I had looked at enough houses to know that trying to re-sell this house with an eyesore like that would be difficult.
Why not just replace them? One word: Money. Replacing the cabinets meant everything would have to be ripped out, so the chances were high that we’d need all new counter tops, a sink, and let’s just be honest- no one wants gross old appliances in a newly done kitchen, so new appliances, as well. Re-doing them ourselves was our best option.
After I’d decided that this was certainly a worthwhile project, these are the steps I took. Follow along, and you’ll have gorgeous re-done cabinets in your own home at a fraction of the cost the stores are selling them at.
Step One: Order All the Supplies
There’s nothing worse than starting a project, getting some serious momentum, and realizing you’re missing something major. I ordered a majority of my supplies from Amazon, and I got the rest from Lowes. Here’s either what I used or something very similar to it:
- Sandpaper (a heavy and a light grit)
- Paint
- Zinsser B-I-N Primer
- Grease Scrubber
- Rags
- Dust Mask
- Eye Protection
- Screw Gun
- Notecard
- Pin/Knife
- Measuring Tape
Step Two: Label and Number all the Drawers and Doors
This step is sooo important. I cannot stress this enough. No matter how much you tell yourself you’ll remember or “just know,” things inevitably get jumbled, and this project just went from “alright” to “horrible” in under ten seconds. If your doors have an inset drilled into them for the hinges to hang on, postpone this step and label them as you take them off. I recommend labeling your doors there after you take them off. Mine did not, so I just used pieces of tape to label them, and I moved them to and from while painting and sanding. Make sure you label which side is the top and which is the bottom.
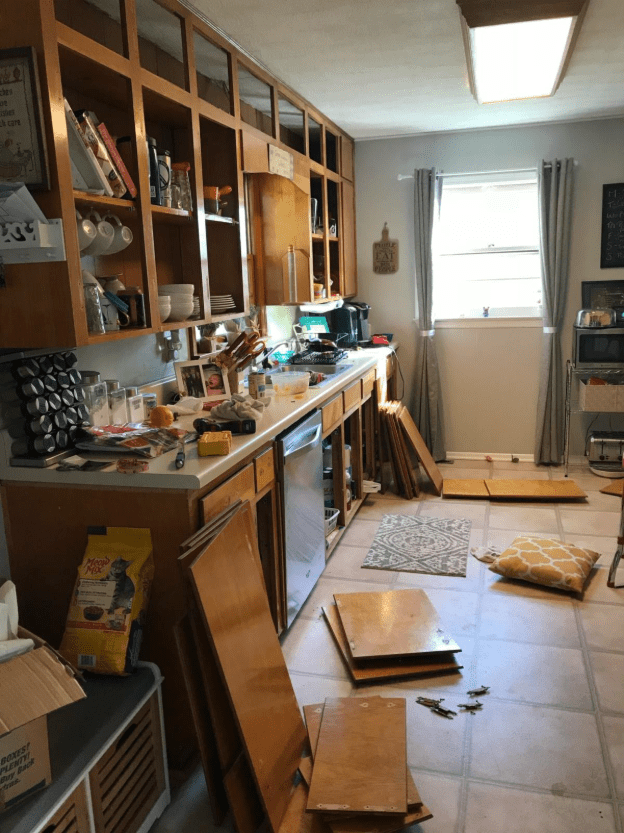
Step Three: Take All Doors Off the Hinges and Remove Hardware
Using your handy electric drill, take down all the hardware. This will include taking your hinges off the doors as well as the actual built in cabinet. Once the doors are down, take off the handles or pulls. Repeat for the drawers, as well. If you plan to reuse your hardware, make sure to store all pieces (screws included) in a secure space. I would recommend a plastic baggie or a Tupperware. I replaced mine with new ones, so I just trashed the old. My hardware was actually copper and completely shellacked over, so this is one of the few places I needed help. By completely shellacked, I mean that I could barely get the screwdriver into the screws. I took off all I could, and my husband helped me with the really tricky ones.
Step Four: Clean All Surfaces
Alright. This section may be a bit controversial if you’ve done any number of DIY projects, but I’ll tell you my opinion on it. A lot of the forums out there on this sort of thing advise that you wipe down your surfaces with soap and water, and then you scrub it down with a substance called TSP. Once you’ve done that, you are to re-rinse the surface to get rid of TSP. If you’re not familiar with TSP, it is a heavy duty cleaning solution. The problem is, it’s toxic and you have to take a lot of care when using it. It’s even banned in some areas. It has been highly praised as being an excellent cleaner to strip away grease and grime prior to painting. I bought TSP, and I wiped down all my surfaces with it using a scrub brush. However, I didn’t notice a difference. This may have been in part because I’m a pretty big germophone/toxin freak/hypocondriach. I basically did the bare minimum and got that stuff away from me. I can’t recommend using that stuff with an honest heart, so I recommend doing your research before hand. Personally, I think a good cleaning with soap such as blue Dawn and water would have been just fine. Whatever you do, make sure you get the grease, food, etc. off before you go any further. It will keep you from having a grody project in the end.
Step Five: Fill in Holes with Wood Filler
Now that everything is sparkly clean, it’s time to fill in all those nasty holes and gouges with wood filler. Woodfiller hardens and sands just like wood, so it’s important to do this step before you start sanding. That way, any rough edges can be taken off pretty easily. I filled in all my holes and any ugly dents, and then I scraped off all the excess with my putty knife. If you plan to re-use your hardware (I did not), there’s really no need for you to fill in your hardware holes, so just fill in any gouges. It will just make your job more difficult if you fill in those hardware holes.
Step Six: Sand Doors, Drawers, and Built-In Cabinets
I got so excited when I finally got to this step. First of all, make SURE you have an electric sander. This is no time to be testing those hand sanding skills! I invested about $45 into an electric sander, and trust me when I say it was well worth the cost. I started sanding with a low, corse grit sand paper. I stared with 60 grit. This quickly and easily took all that ugly, slick shellac off my cabinets. Wearing eye protection and a dust mask, I started with the built-in portion of the cabinets. I sanded until I could tell I had hit the solid wood beneath all the shellac. Once I did that, I went back over it with a higher grit, finer sand paper (grit being 120). When you sand with that low, course grit paper, it leaves little bevels in the wood. Going back over it with that finer paper helps take those out.
Repeat the above steps for the doors and drawers. I set the doors up on saw horses in my garage and sanded down there. I just made sure I kept the garage door open to help reduce the amount of dust.
*** A few notes on this section. First of all, make sure you have your little ones out of the house. I had my husband take Beau out for a couple of hours while I worked on this. It was so dusty, and there was really no way I could watch him while I worked. Plus, that sander got loud, and there was a lot of dangerous equipment around. Second, there’s a lot of dust. Make sure you cover up any thing you don’t want to get super dusty. Third, this part of the project probably took me the longest. Sanding off all that shellac took me a long, long time, but you want to make sure you do a good job here. Taking all that off will give you a smooth finish, and it will also allow your primer and paint to stick better.
Step Seven: Tape Off the Kitchen Cabinets
Blue painters tape is your best friend. Make sure you’ve wiped off ALL dust from sanding, and tape around any edges of the cabinets you don’t want to get primed or painted. I taped the walls next to the cabinets, the windows, the ceiling, the counter top, and the inside of the cabinets (determine if you want to paint the inside of your cabinets. I did not, but it’s up to you). The wide painters tape is the best, but the skinny stuff is cheaper.
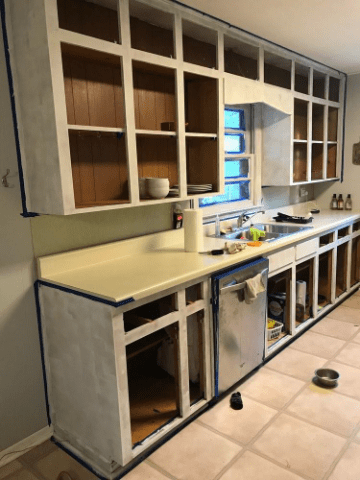
Step Eight: Time to Prime!
DO NOT SKIP THIS STEP. It’s so tempting. You’ve just spent the last X days sanding and doing all that nitty gritty, and priming just feels like a stumbling block. Don’t lose heart! I was so tempted to skip this step, but skipping it will only result in a lousy finished product.
Why prime? Remember how I told you that my cabinets were made out of solid wood (we think it was oak)? Well, when you go to paint, if you don’t prime, the oils start to leak through. Those beautiful white cabinets start to bleed a sickly yellow, and no amount of paint will cover that up. Priming seals in all those oils and gives you a beautiful finished product once you paint. So. With that info under your belt, let me tell you a hard lesson I learned. I did my research, read from real contractors what kind of primer to buy, and when I got to Lowes, I caved. I asked the sales chick what she’d buy, and she led me to this Valspar, latex primer.
It didn’t work. At all. I came in the next morning, and there were huge yellow blotches. I knew it would show through when I painted, so I tried another coat on a small section. It didn’t hide it. There was a warranty on it, so I took it back and got a refund. Don’t buy that stuff if you’re looking to hide oils coming through. So, I finally bought what I should’ve bought in the first place. This stuff is shellac based, and it seals in everything. I highly, highly, highly recommend it.

All the contractors online recommend this stuff. In case you can’t see it too well in the picture, it’s Zinsser BIN Shellac based primer. The cans are little, so I recommend buying two. I did two coats to all wooden surfaces.
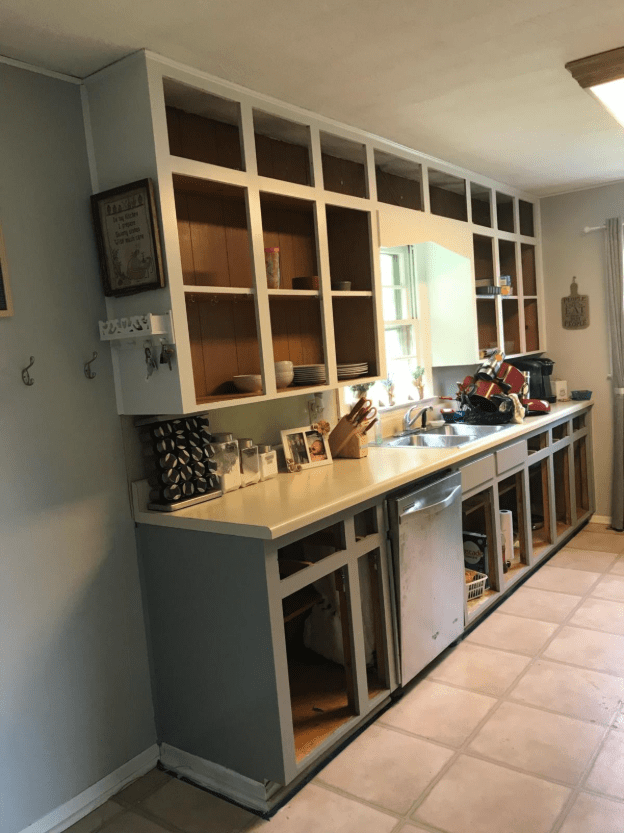
Step Nine: Paint
You thought we’d never get here, I know it. Really, this project is 90% prep work and 10% painting. A good prep leads to a beautiful finished project. For our cabinets, we decided to do white up top and a dark gray on the bottom.
***Quick home tip: white cabinets get dirty pretty quick, especially if you’ve got little kids. They like to touch, stuff falls from the stove, your pup rubs against them- you get the picture. Dark bottoms help hide that dirt and grime, but light tops allow you to have that airy look. End of my tip.***
For paint, you have a few options. You can buy self leveling cabinet paint, or you can just buy regular paint from your local Lowes or Home Depot. I just bought regular paint because the cost on the self leveling paint was top dollar. If you buy regular paint, choose your colors and choose either a semigloss, gloss, or satin. You want a hard paint that easily wipes down once it’s hardened. You can see samples at the store.
To start, I used a paint brush first, and then I used the roller. I used the brush to go around the edges of the cabinets, and then, I went over the rest of it with the roller. This allowed the roller to give everything an even texture. After it all dried, I went over it all with a second coat.
For the doors and drawers, I laid everything down on either the drop cloths or I set them on the saw horses. I would paint one side, wait for them to dry, and then I ‘d do a second coat. If you’re setting them on drop cloths, make sure to prop them up with something. Otherwise, the paint will puddle, and you’ll have nasty extra paint hanging from your doors. No one wants that! Once you have two coats on one side, turn all the doors over and repeat. Make sure to paint the faces of the drawers, as well. Let everything dry, and if you decide you need a third coat, apply an extra coat by first applying it to the front and then the back as above.
Once the built in part of your cabinets has completely dried, run a knife or pin along the tape before removing it. This will ensure that the tape is not stuck to any paint resulting in peeled paint. It’s an annoying step, but neglecting it will result in paint tears.
Step Ten: Add Hardware Holes
Now that you’ve painted everything, it’s time to add the hardware holes. You want the holes for your hinges to be the same distance from both the top and the bottom to make it look uniform. Using a notecard, I lined it up with the upper corner of the door that would be connected by the hinges. I measured and marked on my notecard how far down I wanted the top of my hinge to attach. I then drew a line on my notecard and cut it at the line. Once cut, I lined it back up with the top corner and edge, took one of my hinges, and lined the hinge up with the bottom of the notecard and the edge of the cabinet door. At this point, I took a pencil and traced the holes. I did the same for the bottom edge of the cabinet door to determine where my bottom hinge needed to be attached. I did this all on the backs of my doors because the hinges I bought were invisible. You could see where they screwed into the built-in part of the cabinet, but you could not see it connected to the door. Depending on the hinges you buy, it may differ. Repeat this process for all doors. For my drawer pulls and knobs, I essentially did the same thing. I took a notecard, measured how far down I wanted my knob/pull, and marked the holes. It may be beneficial for you to use a measuring tape in this instance if you are trying to get the drawer pulls perfectly centered.
Step Eleven: Add Your Hardware
Once you’ve marked your hardware holes, add your hardware. If you bought hardware, it should have come with instructions. I would begin with the hinges. Place the hinge in the correct spot, and hold it while you screw it in. For the knobs, add the screw and then screw the knob into place. Check your new hardware for instructions on how to correctly attach it to your cabinets. Always check to make sure you have applied the hinges, knobs, etc. to the correct side of the door. Adding it to the wrong side with require you to re-fill your holes as well as re-paint.
Final Step: Attach Doors
The final step is to attach your doors back to the cabinets. This is a two person job, so get your husband, friend, or someone strong with lots of patience to help you out. Carefully take one numbered door at a time and line it up with your door opening. Tightly hold the door against the opening and have your helper screw it in to the cabinet. Repeat this step until all doors are back up. Add your drawers back into their original openings, as well.
***Remember how I mentioned that it was really important for you to label your doors with both numbers and which side went up and which side went down? Well, if you neglected this step it becomes painfully obvious right here. Things don’t close right, sticking occurs, you have extra doors- it’s AWFUL. Make sure that all through the process you’re keeping track of the door numbers and which side is up and down. You will avoid so much frustration.
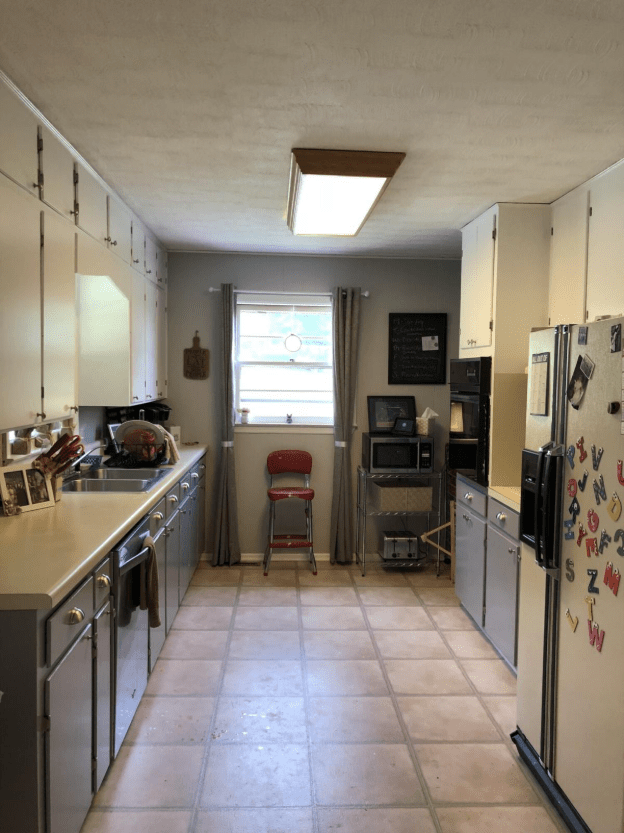
Here’s my finished project! I loved, loved, loved it, and it really modernized the home. So much light danced around our kitchen once the whites and grays were added and it gave it that really airy feel.
Closing Thoughts
That’s it!!! This project took me approximately two months. I will disclaim that it took me awhile because I had a toddler, we went to a wedding, and the summer is Paul’s busy season at work. If you were doing this project without those elements and could persevere, I would estimate that this project would probably take somewhere between two and four weeks.
Home Advisor estimates that a typical 10’x10’ kitchen ranges from $4,000-$13,000 to actually purchase and install all new cabinets. This project cost me around $350. That cost includes the consumable things such as paint and wood filler, as well as the hardware and sander. I did not include the things I had lying around my house such as the screw gun, rags, etc., so this project ranges based on what you have.
Have you redone your cabinets? I’d love to hear about it with any tips you may have!
October 24, 2019


Leave a comment